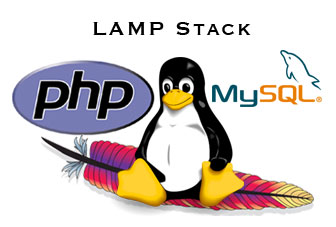
LAMP stack is a group of open source softwares used to get web servers up and running. This guide assumes that you already have your CentOS installed successfully.
1. Install Apache
Apache is the web server in the lamp stack.
Install apache command
sudo yum install httpd
Start apache on your server
sudo service httpd start
(Optional) Test if apache isÃÂ alive
Get your IP address first
ifconfig eth0 | grep inet | awk '{ print $2 }'
Then open the following url in your web browser
http://youripaddress
2. Install MySQL
MySQL is the database management system used in LAMP stack.
Install MySQL command
sudo yum install mysql-server
Start MySQL service
sudo service mysqld start
Set a root MySQL password
sudo /usr/bin/mysql_secure_installation
This will prompt you for your current MySQL root password, which you will most likely have none, because you have just installed MySQL only. So just leave it blank by pressing enter.
Enter current password for root (enter for none):

OK, successfully used password, moving on...
NextÃÂ a series of yes/no questions will appear. All you have to do is just say Yes to all the options.
By default, a MySQL installation has an anonymous user, allowing anyone to log into MySQL without having to have a user account created for them. This is intended only for testing, and to make the installation go a bit smoother. You should remove them before moving into a production environment.

Remove anonymous users? [Y/n] y

... Success!

Normally, root should only be allowed to connect from 'localhost'. This ensures that someone cannot guess at the root password from the network.

Disallow root login remotely? [Y/n] y

... Success!

By default, MySQL comes with a database named 'test' that anyone can access. This is also intended only for testing, and should be removed before moving into a production environment.

Remove test database and access to it? [Y/n] y

- Dropping test database...

... Success!

- Removing privileges on test database...

... Success!

Reloading the privilege tables will ensure that all changes made so far will take effect immediately.

Reload privilege tables now? [Y/n] y

... Success! Cleaning up... All done!

If you've completed all of the above steps, your MySQL installation should now be secure.

Thanks for using MySQL!
3. Install PHP
Install PHP command
sudo yum install php php-mysql
(Optional) Install additional php modules
Search for PHP modules command
yum search php-
Next a bunch of php modules with their description will appear. So just use yum to install which ever modules that you want.
sudo yum install name_of_the_module
4. Configure Apache and MySQL to run on boot
sudo chkconfig httpd on

sudo chkconfig mysqld on
5. Test if PHP is working on your server
By default apache web root directory is atÃÂ /var/www/html
Create a file calledÃÂ info.phpÃÂ
sudo nano /var/www/html/info.php
(Optional) If nano is not installed yet
sudo yum install nano
Add the following code toÃÂ info.php
<?php

phpinfo();

?>
Then save and exit
Restart Apache and visit the url on your web browser as follows
http://youripaddress/info.php
Then you should see your server’s php information
Feel free to contact me at [email protected] if you have any further questions.


0 Comments